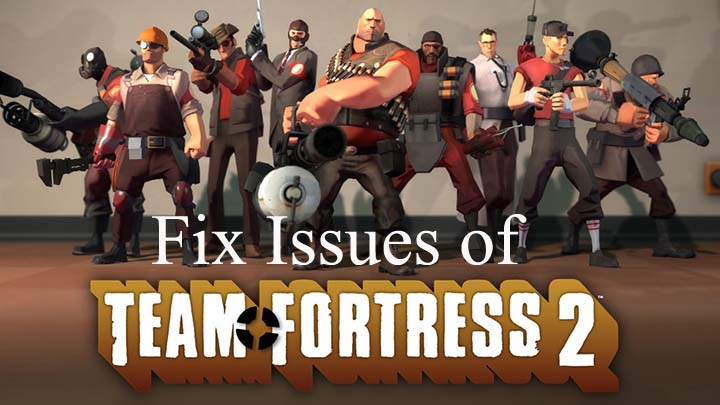
How To Fix Issue Team Fortress 2 Not Working?
Team Fortress 2 is a fantastic action game played online by players across the globe?
These game developers also create competing events among gamers worldwide, which makes this game more interesting. So, This first-person
The shooter game is also addictive and available to cherish via Steam Game Launcher. But, some players have been accused of Team Fortress 2 online launching issues. Well, The guide will describe some troubleshooting steps to do yourself on fixing Team Fortress 2 not working.
Easy Ways On How To Fix Team Fortress 2 Not Working
As excellent, there are many options that you can carry out to fix this issue.
As reported on many game forums, the four methods posted here are the most successful ones.
Solution 1: Do Not Overclock The GPU
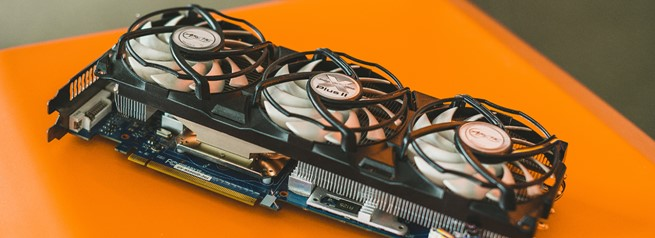
The Overclocking your Graphics Processing Unit is how users can adjust and tune their GPU’s from the base speed and surpass it. So, This feature improves gaming performance but is not advised in the longer run.
Well, it’s suggested for those who know how overclocking works to readjust their GPU at the base speed to fix team fortress 2, not launching issues. Here, To others who do not know about overclocking, go to the next fix below.
Solution 2: Run The Game In Administrator Mode
Microsoft enables users of Windows 10 to run an application in admin mode so that it has access to all system resources and, at the same time, has the requisite permission to act as a system application. Also, you need to follow these steps to allow this elevated mode for Team Fortress 2:
Step 1: Head, Make a right-click on the Steam Launcher, and from the context menu, click on Open File Location.
Step 2: Next, A File Explorer window will open to choose the SteamApps folder and open it.
Step 3: Now, select the folder labeled as Common and open it.
Step 4: Here, you will see many game folders to locate and select the Team Fortress 2 folder.
Step 5: Next, Make a right-click on HL2 to open the context menu and click on properties.
Step 6: So, From the properties tab, click on the Compatibility tab and place a check next to Run this program as an administrator.
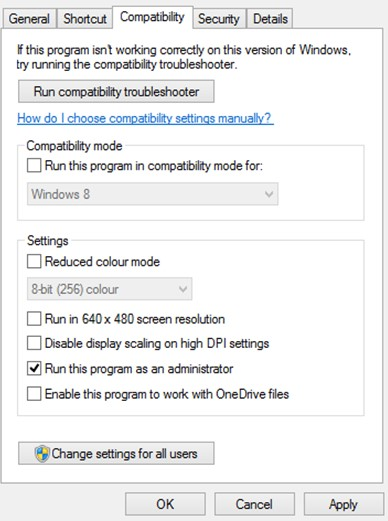
Step 7: Tap on Apply and then click on OK.
Step 8: Lastly, close all programs and reboot your computer. So, Now try launching the game to see if the issue persists.
Solution 3: Game Files Integrity Verification
As well, All games installed via Steam store a lot of game files on your computer’s hard drive. This depends on these files as to how the game will function on your PC. Suppose there are any corrupt or missing files, then the users will face issues. This is recommended to check the game’s files’ integrity to resolve the problems like not launching the game. Now, here are the steps to perform this:
Step 1: Sart, Launch Steam Application, and then click the Library tab on the top.
Step 2: Select Team Fortress 2 from the game’s list and make a right-click to make the contextual menu appear.
Step 3: Then, From the context menu, click on Properties to open a new window.
Step 4: Next, click on the Local files tab and then click on the Verify Integrity of the Game Files button.
Step 5: Well,
The process will take time as most games are more than 10 GBs in size.
So, Once the method has been completed, relaunch the game to check if the issue has been fixed.
Solution 4: Update Graphic Card Drivers
This the final choice on how to fix Team Fortress now working issue is to update your drivers. So, Drivers act as a medium between your computer’s virtual and physical components, i.e., the software and the hardware.
This is necessary to keep your drivers updated daily, and there are three ways of doing so.
Method 1: Use The Official site
But, All graphics card manufacturer maintains an official site where users can find updated drivers, user manuals, and other sources. So, These websites offer updates for free but require time, effort, and necessary technical skills of searching, downloading, and installing the file.
This general method of updating the drivers is the same for all products, and here are the necessary steps:
Step 1: First, navigate to the official website of your graphic card manufacturer.
Step 2: Next, search for the resources related to your product.
Note: You should know the exact model number and the product’s version to find the most suitable driver.
Step 3: Next, Locate the driver section and click on the download button.
Step 4: Now, Once the drivers have been downloaded, double click on it and follow the onscreen instructions to install it.
Step 5: Here, After the installation method finishes, reboot your PC and then check if the issue has been solved.
Method 2: Use The Device Manager
This Device Manager is a free tool provided via Microsoft to all Windows 10 users to identify the hardware installed in your PC and search for the best possible driver on the Microsoft Server. It is the best tool but has a particular limitation of not enabling to look for updated drivers on OEM sites. Now, here are the steps to use Device Manager on your PC.
Step 1: Start, Press Windows + R to open the Run box and type “devmgmt. msc” in the search box.
Step 2: Next, press the OK button on the Run box to open the Device Manager window.
Step 3: Next, Once the Device Manager window opens, locate Display Adapters, and click on it to show the dropdown options.
Step 4: Now, Right-click on your graphic card list. From the context menu, choose Update Drivers.
Step 5: Follow the onscreen instructions, and this will update your graphic driver’s Giving. There is an updated version available on Microsoft Server.
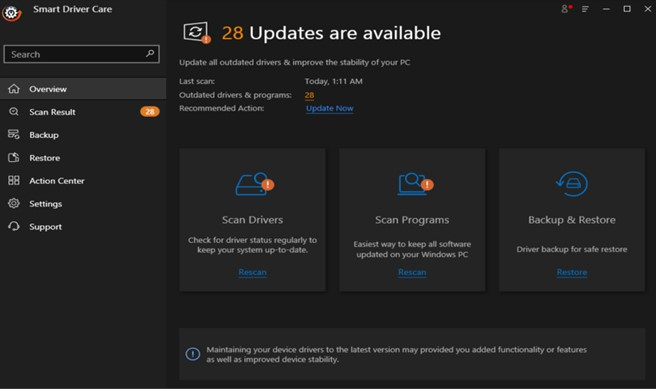
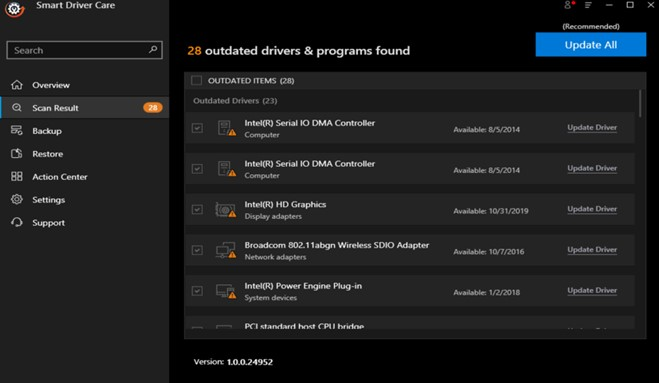
Method 3: Use Smart Driver Care
With these recent developments in software technology, a few apps can scan your hardware and search for the updated drivers within a matter of some clicks. Well, Those apps search worldwide for the latest and most compatible drivers and replace any outdated, corrupted, and missing drivers installed in your system. Now, One such tool to update your drivers is Smart Driver Care. Here are these steps to use Smart Driver Care on your computer.
Step 1: Start. You have to download the app from the official link given below.
Step 2: Once the file has been downloaded, and you can double-tap on it to install the application. This installation method is easy, and you need to follow the onscreen instructions with positive responses.
Note: Thi the first version will be installed on your system to update only two drivers of your computer each day. Well, To update more than two drivers daily, you will have to buy the Pro version.
Step 3: Now, Open the Smart Driver Care after the installation has been completed
A click on Scan Now links in the application screen’s first box.
Step 4: As well, A listing of all the driver issues will be displayed on your screen.
So, Locate your Graphic card in the list and then click on the update button next to it.
Note: Next, updating the graphics card driver, you can update one more driver of your choice, as there is a maximum of 2 driver updates per day.
Suppose you have the PRO version, you can click on the Update All button, and all drivers’ issues will be fixed in one go.
After the driver updates finish, restart your computer and check if the issues with Team Fortress 2 have been resolved.
Final Words:
Many consider upgrading the hardware parts or the complete computer itself when Team Fortress 2 is not working. Yet, this issue can be resolved by any of the four options explained before. Here, You want to follow all of them and launch the game after each step. To discuss the method that fixes your issue as this would help others face a related problem.